We received lots of email from our users which are related to the following problems:
- How to copy one or more records of the Recording History to another computer?
- How to copy all Recording History to another computer?
- How to add multiple audio/video files from Windows folder to the Recording History?
- How to backup and restore the Recording History?
- The Recording History database was corrupted. How to restore it, because all the audio and video files are located on the hard drive?
Starting with version 3.3, Amolto has new features to perform all operations listed above.
Export recordings
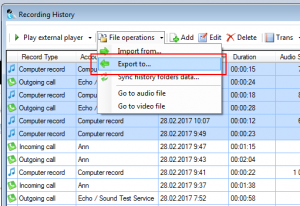
Open Recording History form and enter into the “File operations” option to choice “Export to…” menu
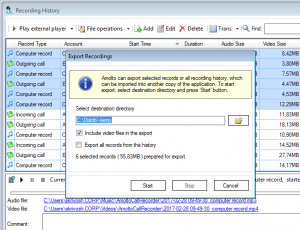
“Export Recordings” dialog appears. Select the destination directory for exported files and define the options.
1. Include video files into the export – If this option is checked, audio and video files will be exported. If not checked – only audio files.
2. Export all records from the history – If this option is checked, all records from the history will be exported. If not checked – only selected recordings will be included into export.
At the picture below 6 records were selected in the Recording History form. Press “Start” to start export.
NOTE: All comments and other fields from the history will be exported and embedded into audio/video files.
Import recordings
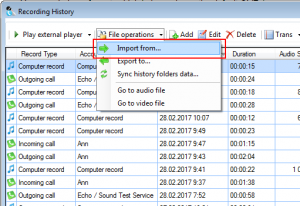
Open Recording History form and enter into the “File operations” option to choice “Import from…” menu
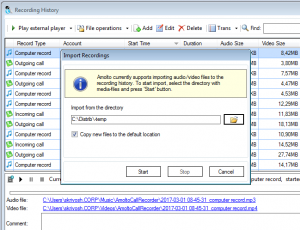
“Import Recordings” dialog appears. Select the directory with exported files and define the option.
Copy new files to the default location – If this option is checked, all files will be copied to the default location for Amolto files. If not checked – the files will be added to the history directly from the import directory.
NOTE: If the import directory is located on USB drive, this option must be checked.
Press “Start” to start export.
Sync history folders data
This operation synchronizes files from the directories for audio and video files in Amolto settings with the Recording History database. Also this operation writes all data fields directly into the audio and video files as ID3 tags.
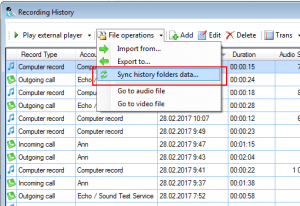
Open Recording History form and enter into the “File operations” option to choice “Sync history folders data…” menu
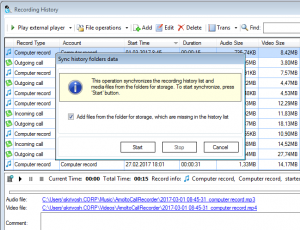
“Sync history folders” data dialog appears. Define the option.
Add files from the folder for storage, which are missing in the history list – If this option is checked, all files from the default location for Amolto files, which are missing in the history list, will be added to the history. If not checked – only ID3 tags will be synchronized.
NOTE: If for any reason the Recording History database was corrupted, this operation will recover the data from the audio/video files and build new Recording History.
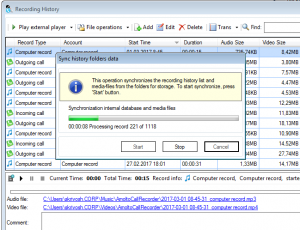
Press “Start” to start synchronization.
Amolto Team

